Haylee and I were really excited to get to review Project Passport World History Study: Ancient Egypt by Home School in the Woods.
WHAT IS IT?:
Project Passport World History Study: Ancient Egypt is an exciting new history adventure by Home School in the Woods. It offers students multi-sensory opportunities to learn about life in Ancient Egypt through a variety of mini-lessons, hands-on projects, activities, audio elements, and a lapbook.
Project Passport is recommended for grades 3-8. It includes a variety of activities to suit an array of interests and learning styles, including games, creative writing, notebook projects, and cooking opportunities. And it includes over a dozen high-quality projects for a lapbook that students assemble at the end of the adventure.
It can be ordered as a downloadable version for just $33.95 or on CD for just $1 more.
OUR EXPERIENCE:
If you’ve ever used lapbook projects from Home School in the Woods in the past, you know that nothing else quite compares to the quality of the finished projects. So imagine the fun of one of their infamous lapbooks combined with really interesting hands-on projects and creative writing opportunities, and that’s what you’ve got with Project Passport!
We’ve tried other Home School in the Woods products in the past, such as the Hands-On History: 20th Century in America lapbook and Time Travelers: Industrial Revolution through the Great Depression, so we knew we were getting a quality product that would not disappoint when we received Project Passport: Ancient Egypt to review. I was really impressed! Haylee loves this kind of hands-on project, particularly ones with a creative element where she gets to color, decorate, and create illustrations. It even motivated her to want to do the creative writing assignments!
Project Passport is set up like your student will be traveling through Ancient Egypt. Through a series of 25 “stops” on the travel itinerary, your child gets to learn and experience life in this far-off land. The whole trip is designed to last 12-16 weeks, depending on your chosen pace, but Haylee and I set out to accomplish 2 stops per week to supplement our regular history studies of Ancient Egypt. So for us, it will supplement our studies for at least 13 weeks. For this project, you’ll need some basic materials, to include 2 binders (one for the teacher and one for the student to create a scrapbook), an assortment of white and colored cardstock, and an assortment of white and colored paper. You’ll also need basic supplies like a stapler, tape, scissors, and a glue stick. I’m going to take you through the first 8 stops that we did to give you a good idea of what kinds of activities are included.
Haylee decided up front that she would like me to pre-assemble the different physical elements for her, and then she would do the actual assignments involving them. So each week, I’d print out the pages needed and pre-assemble the elements for her before we read the lesson and completed each stop. I also went ahead and printed out all of the lessons and itineraries for each stop to put into my binder. I like to be really organized, so I chose to use some numbered tabs I already had to separate the instructions for each stop in my binder.
STOP #1: After a brief lesson on the Creation and the establishment of the civilization of Egypt, we began the tasks for our first stop.
First, we prepared a luggage folder. It was so cute, complete with a luggage tag! I thought it was fun to make, using a 3-pronged folder cut down to size with an included template. It has travelogue pages inside where Haylee can record her reflective thoughts on the “trip” at the end of our adventur e.
e.
Next, we created a passport. Of course, Haylee had to have a pink passport! We had fun selecting a passport photo of her, filling out the traveler info, and adding our “passport stamp” for Ancient Egypt. If we do other Project Passport projects in the future (like Middle Ages or Renaissance & Reformation), we’ll get new passport stamps to add for those places.
Then we prepared the student binder called the Scrapbook of Sights. This is where Haylee would be keeping all of her projects as she created them. Haylee loved decorating her binder cover in rainbow colors to show off her colorful personal style!
Next, we prepared the Snapshot Moments in History timeline. This was really cool! Haylee loved how it all folded down to fit in the binder, but you could easily pull it open to see the whole timeline at once. It’s a great design that’s so easy to use. For this stop, she got to color and place the first timeline figure, “Mizraim’s people settle in Egypt.”
After that, we created the map of upper and lower Egypt. It was neat how it folded up and down so it could be stored in the binder. Haylee got to color and place titles for the Mediterranean Sea, the Nile River, the Red Sea, Lower Egypt, Upper Egypt, Sanai, Egypt, Nubia, and the Delta.
Lastly, we created a postcard rack to store in the binder. This was a cardstock page with three handy storage pockets on it where she would be storing the postcards she created throughout the trip. On this stop, she got to read the postcard from Mizraim and then draw a coordinating picture on the flip side.
STOP #2: After a short lesson on the importance of the Nile to the people of Egypt and how people came to settle and thrive there, we began our assignments for this stop.
First, Haylee got to color and place some timeline figures for Imhotep, Menes unites Egypt and founds Memphis, and the souvenirs for King Tut’s Tours Coach Ticket and Boat Trip Boarding Pass. Haylee enjoyed finding their proper placement on the tim eline, and she thought the souvenirs were a cool addition to the timeline.
Next, she colored and placed titles on her map for Memphis, 1st Cataract, 2nd Cataract, Swenet, and Elephantine. Then we got to run a line of glue along the banks of the Nile and cover it with black pepper to represent the kemet that remained when the banks were flooded. We both thought that was an awesome representation! Doing that was a lot of fun.
Then we got to prepare the new spaper called The Kemet Chronicle. This was really fun! We printed it on cream-colored cardstock that made it look like an aged newspaper, and Haylee really liked that. Then she got to write articles in the newspaper for “Nile River Floods Its Banks,” and “Upper and Lower Egypt Combine!” She got the information for those articles from the lesson we read at the beginning of this stop. Then she got to create an advertisement for “King Tut’s Tours” in the newspaper. She had a lot of fun with this ! I loved that the creativity of this assignment even motivated her to complete these simple creative writing assignments.
Next, we made the first element for the lapbook called “The Unification of Upper and Lower Egypt.” Haylee really enjoyed this assignment, because she got to read the text and take the two crowns from the heads of the rulers of upper and lower Egypt and combine then on one head to signify the unification of the two regions. That was pretty neat! We were instructed to save this lapbook element in a Ziploc bag, which we stored in one of the pockets of her scrapbook.
Lastly, we used the link to listen to an audio tour of Touring Down the Nile. This was the first of eight tours we would encounter on our journey.
STOP #3: Our mini-lesson for this stop taught us about what Egyptians wore, what they ate, and where they lived. Then we began our activities.
First, Haylee colored and placed a souvenir for her timeline for Satiah’s Salon & Spa Receipt.
Next, she created newspaper advertisements for Satiah’s Salon and Spa and Kushite Cuisine. She really enjoyed making illustrations for the newspaper ads.
Then, we created a pocket page to hold craft cards in her Scrapbook of Sights. Then we printed the craft cards for Dress Like an Egyptian (one for a girl and one for a boy) and stored them in the pocket page. We printed the templates for the crafts but chose not to create them at this time. We  discussed maybe making an Egyptian girl’s costume from fabric using these templates and using it as a Halloween costume this year!
Next, we created the Dining Out Guide and the Egyptian Kitchen booklet with recipes for Egyptian dishes, including a beverage and dessert! We stored these in the Ziploc bag to be used in the lapbook later.
Then we created pocket pages with text that explained what Egyptian men ad women wore. It included lots of cardstock clothing, jewelry, and accessories that Haylee cut out, colored, and placed in the pockets. Then she was able to play paper dolls with the items to dress up the man and woman in their traditional dress. She had a lot of fun with this activity! It was right up her alley. She’ll be able to use this over and over again, and it stores in her Scrapbook of Sights.
Lastly, we read about an activity where you make two types of mud bricks: one with straw and one without. Then you’re supposed to compare the strength and durability of each to see why Egyptians liked to use straw in their bricks. We had a hot, dry spell with the weather that made it difficult to dig up dirt in our yard, but we talked about why one would be stronger than the other, read through the text, and discussed how the Egyptians had tried to punish the Israelites by withholding the straw from their brick-making and the impact that would have had on the results. Haylee really wanted to complete this project, so I’m sure we’ll be coming back to this activity once we’ve saved some empty milk cartons and collected some wet dirt to work with.
STOP #4: After a brief lesson on Egyptian authority, family life, jobs and careers, and typical entertainment in Egypt, we began our projects for this stop.
First, Haylee colored and placed timeline figures for Fish & Game License and the souvenirs for Live Wrestling Admission Ticket and Gamers Membership Card. Haylee really liked coloring the “extras” for the timeline.
Next, we created the interactive page called the Social Pyramid of Egyptian Authority. This page was a lot of fun to make. When viewed from the top, it looked like a brick building. But each floor of the building had a flap you could open, which “popped out” a picture that Haylee had colored and also revealed some text explaining each level of Egyptian social structure, all the way from the Pharoah at the top down to the slaves and servants at the bottom. This was a unique way to visualize this hierarchy.
Then we created a gameboard for the game of Senet, a typical game played by Egyptians at that time. It was even found in King Tut’s tomb! The gameboard looked pretty cool, but when we started reading all the rules and instructions for gameplay, it was a bit overwhelming for Haylee, and she decided not to play it just yet. We’ll probably come back to this another time.
Lastly, we created a really cool wheel that showcased various jobs you might hold in Ancient Egypt. As you spun the wheel around to show a particular job, you could read about what the job entailed on the cover. Haylee enjoyed coloring each of the workmen on the wheel. We stored this away in our Ziploc bag to be included in the lapbook later on.
STOP #5: In this lesson, we learned about graves, pyramids, the Valley of the Kings, mummies, funerals, and sarcophagi. That was pretty interesting! Then we began our assignments for this stop.
First, Haylee colored and placed a timeline figure for First Step Pyramid is Built.
Then, she used the information in the lesson to do write an article in the Kemmet Chronicle for “Making Mummies.” She also created advertisements for “Sabet The Sarcopha-Guy” and the “Mummy-To-Be Shoppe.” She had fun drawing for those.
Next, she read the text of a postcard from Hero dotus and drew a corresponding illustration on the flip-side to add to the postcard rack in her scrapbook.
Then we made a really cool booklet on Egyptian Mummies. Each page explained another step in the process, and Haylee got to color the illustrations in the booklet as she read through the descriptions. There’s even a booklet-within-a-booklet, and it turned out really neat. We stored this in our Ziploc bag to be included in the lapbook later on.
Next, we printed out two more Souvenir Craft Cards. There was one for how to make a mummy and sarcophagus that we really want to try when we get the muslin fabric. Haylee went ahead and colored the faces and decorative pieces for the mummy so that will be ready to go when we get the needed supplies. The other craft card was on how to make canopic jars. That looked like it would be neat to go along with the sarcophagus, but we definitely want to make the mummy first.
Lastly, we listened to an audio tour of an “Interview with an Embalmer.” That was interesting!
STOP #6: The lesson for this stop on the itinerary was all about agriculture, trade, and transportation, and the we started o n the activities for this stop. There wasn’t a lot to this particular portion of the itinerary, but it gave us a little bit of a break during a busy week for us.
First, Haylee wrote an article for “Wadi Hammamat Extends Trade to the Red Sea” for the newspaper, based on what she learned about trade in the lesson. She also created an advertisement for “Trinkets & Treasures…from Beyond the Border.”
Lastly, we printed up a Souvenir Craft Card on how to “Make a Reed Boat.” Unfortunately, we did not have access to any reeds to be able to make this one, but we still learned about it from reading the craft card.
STOP #7: In this lesson, we learned all about education in ancient Egypt, including the role of scribes, what children went to school, and how the scribes wrote on papyrus scrolls with reed pens and ink made from soot and gum from vegetables. The ink was solid and was then diluted with water, much like th e Chinese ink stone Haylee used last year when we were studying the countries of the eastern hemisphere. Then we began our activities.
First, Haylee colored and placed a timeline figure for “Ostraca with Fraction” on her timeline.
Next, she wrote an ar ticle for “Official Question, ‘Are Schools Strict Enough?’” for the newspaper based on what she learned about Egyptian education in the lesson. Then she created an advertisement for “Weni-Mart.”
Lastly, we printed another souvenir craft card for how to “Make a Papyrus Scroll.” This is one I think we can do without a lot of special materials on a weekend when we have some free time. The cool thing about the craft cards is that even if you don’t have time or interest in completing the crafts, you can still learn a lot about the topic by reading the information on the craft cards.
STOP #8: In this lesson, we learned about the Rosetta Stone and its role in helping modern-day people understand the language and symbols used by ancient Egyptians. It was really the key to decoding hieroglyphics. Then we read about how hieroglyphics were used a nd what kinds of things the ancient Egyptians wrote about. Then we began our activities for this stop.
First, Haylee colored and placed her timeline figures for “Rosetta Stone is carved,” “Hieroglyphic language is developed,” “’The Shipwrecked Sailor’ is wri tten,” and the souvenir for “The Shipwrecked Sailor” Bookmark.
Next, Haylee wrote an article for “Rosetta Stone Discovered!” in the newspaper.
Then she read the text of the postcard from Ptolemy V Epiphanies and drew an illustration on the reverse side before adding it to her postcard rack in the scrapbook.
Next, we printed out another Souvenir Craft Card on how to “Make a Cartouche.” This one looks like fun! We should have some free time this weekend, so I think at the very least, we’ll do the paper version of this craft, it not go all the way and make the tablet version out of homemade salt dough. She will get to write or carve her name in hieroglyphics on it! That’s pretty cool.
Then we printed out a pencil-and-paper activity where Haylee got to use the guide on writing hieroglyphics to translate some writing. She did really well with it! That was a lot of fun for her. When she finished with it, we stored it in her scrapbook.
Lastly, we listened to an Audio Tour of “Visiting a Temple School.” It was interest to hear how stern the teachers were!
********************
There were so many wonderful activities to explore in this Project Passport kit, and we’ve really learned a lot so far! We’re only a third of the way through the  whole thing, so I can only imagine how much more we’ll learn along the way! I love the flexibility and variety of activities in this product. There are already so many wonderful keepsakes in her Scrapbook of Sights that I can only imagine how many goodies she’ll have in there by the time we’re through!
Since this coincides with our study of Ancient Egypt in our regular history studies for school right now, we do plan to continue using this throughout the school year. To spread it out a bit more and keep it going as a fun supplement to our studies, I think we may slow down the pace to one stop per week. By doing that, we can make it last beyond the half-way point in our school year. We do school 4 days/week, so it could be a fun things to bring out on Fridays to work on together. Haylee is really into crafts and artistic things, so I think it will continue to be a fun way to continue our studies. I love how you can pick and choose the activities you want to do, and even if you don’t do everything, there’s still good educational insight you can glean from reading through the extra projects.
As always, I’m great impressed with this new product line from Home School in the Woods, and I’m sure you will be, too! We’re really excited to get to the end, too, and see how the lapbook project turns out!
Check out what other Crew members had to say about this and other Project Passport products by clicking the banner below.



 and Algebra 2 (grades 10-11, coming soon). All of the courses are completed online, so there’s nothing to download.
  ’m not sure where to go for next school year when we do hit Pre-Algebra.
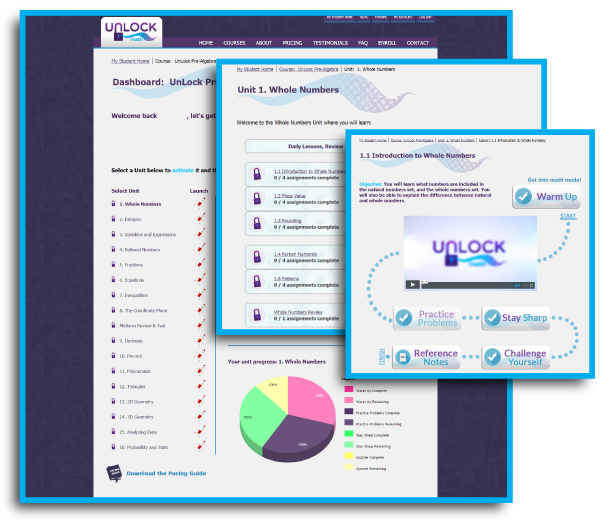
  omplete things in the wrong order. This happened to us at one point because we were following the lessons vertically on the screen, not realizing that they were in sections with quizzes for each section rather than at the end. So in the first unit, she did all of the lessons in order, then all the quizzes, and then the test. And I was the one directing her to the next lesson, so we both made that mistake!


![HSP-Style1-Portrait-Alt1-LightBlueBG-1024x1024 (1)[384] HSP-Style1-Portrait-Alt1-LightBlueBG-1024x1024 (1)[384]](https://blogger.googleusercontent.com/img/b/R29vZ2xl/AVvXsEhVYXD_N6cCsGl0zDCvIfBx6GtTvifp4Z4tLMmOj7Fb03iugocrYp4y2OTdNR6BgGmxbMri7I1LBCbgVP0IFG0u03U1fkvfAB8qweuVgZJYftUHufOxSkokINp1LINAYuGOeP8CtXtAav_l/?imgmax=800)
![aff-1-1000x1000[383] aff-1-1000x1000[383]](https://blogger.googleusercontent.com/img/b/R29vZ2xl/AVvXsEiR6PmPe_u8Vl0YmkJ12U4ma2-3iPPQDjFFt2ghaX2-F12UU64eGsXHUeNU3KzMPLp70ky4n-pufSq0xcFc3HmQyDp_hrz3UUUAOG_gy7Z0h4JrErW-T9kW5fQN-Xo97pYTVvNMKsZW2VWt/?imgmax=800)
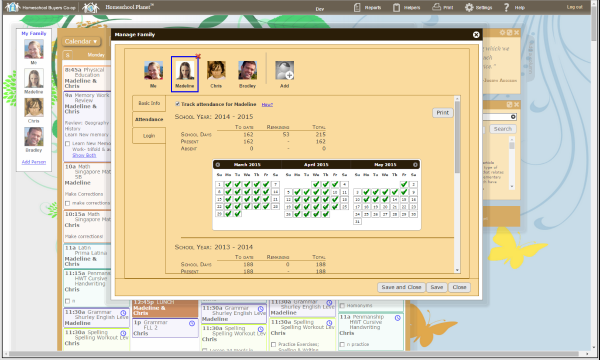 . We had a few weeks of our school year left, so I thought that would be a perfect time to enter our remaining assignments and get a feel for how it worked without investing too much time in case it didn’t work for me. So when we had a couple of days off from school, I set up my account, students, and school year information, and then I spent some time watching the simple tutorial videos that are built in to the program in the “help” section. Then I entered just a week of school at first so I could overcome any learning curve before I got too far. I did learn some shortcuts and simpler ways of entering information by doing it that way, so I would definitely recommend that you start with a sampling of information when you first try it out so can learn as you go. It will definitely save you time when you sit down to enter a larger volume of information on your next try. So all I did on this first attempt was to enter a week of assignments for two kids. I played around with printing them out in different report settings and switching between calendar and planner formats. It was pretty cool to see all the customization I could use to get just the right printed planner I wanted.
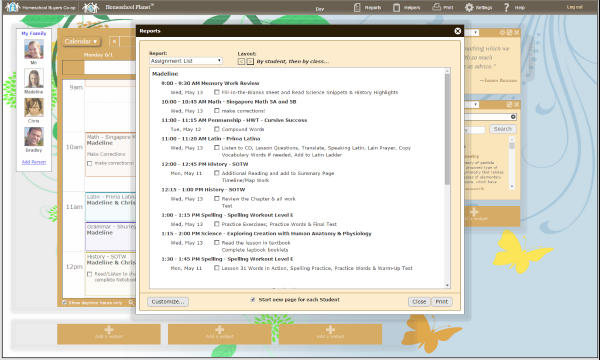 for us. And once I understood better how to enter large chunks of information quickly, it was all so easy to do! I found it to be quite intuitive for me to use, and I found the learning curve was pretty short…I pretty much had it mastered over the course of a couple of days. I had set up personal logins for the kids, and they were able to pull up their assignments on their tablets (iPads or Nabi Android tablets) pretty easily. We could check off the assignments as we did them on the tablet, or they could use a printed version. My daughter found she liked having a printed assignment sheet best, so we played around with different formats until she found the one she liked best. Since my youngest is only 7, I pretty much manage his schedule for him, since we still do all of his work together. So I found I liked having the schedule up on my iPad to check off as we went through the day. It’s really nice that it can be used digitally or on paper like that to suit each user.
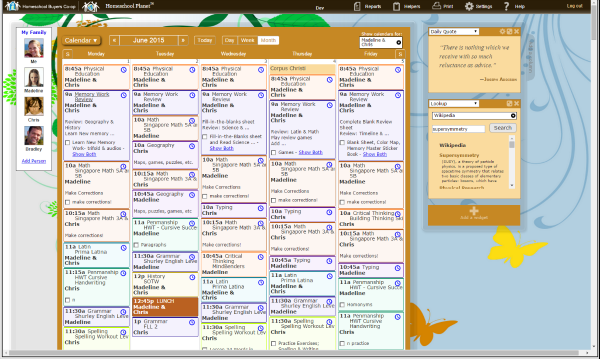 section in the program where you can leave feedback on any issues you’ve had in using the program or any feedback you’d like to offer on how to make it better. Several times, I’d offered up suggestions or things that didn’t work for me and what would work better, and I’m quite impressed to say that they always took the suggestions to heart and had already made some of the changes by the time the month was over! That was great to see. Whether we were chosen for the review or not, I knew we would be continuing to use it, and it would be well worth the purchase price to us! So with that decision made, I went ahead and took some time during our week off from school to enter the whole next school year for both kids. It was even easier this time because I’d already learned a lot from playing with the small amount of data I started out entering, and it went really well. In no time at all, I was all set for our new school year! So when I was chosen for the review, I was absolutely ecstatic!
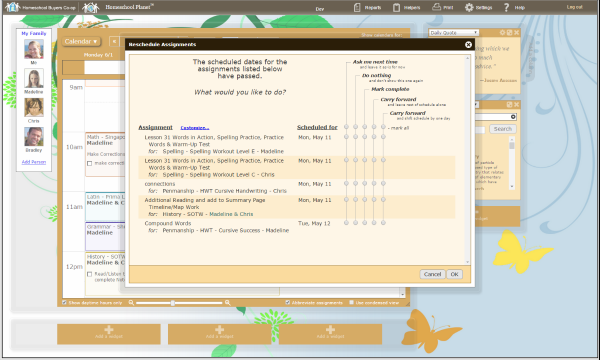 got 2 of our vehicles inspected before the week was up.
 iterally manages my life at this point. It has a whole year of our school assignments, all of our sports practices and game schedules, all of our doctor and dental appointments, my shopping lists, my to-do list, my commitments to volunteer at my oldest son’s school, committee meetings, field trips, and even my due dates for my reviews, all in one place! I can’t tell you how much that has improved my life!


