
We were excited to get to try out HomeSchoolPiano – Complete Set of Books by HomeSchoolPiano.
WHAT IS IT?:
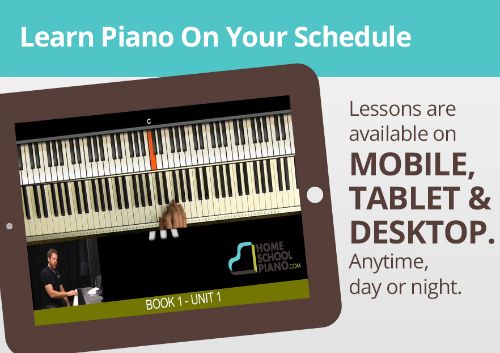
HomeSchoolPiano is an online video piano course that allows you to practice in the comfort of your own home. You can access any of the 4 courses (Core Piano, Book 1, Book 2, or Book 3) in the program by accessing the videos over your internet connection on your mobile device, tablet, or computer at your convenience, available to you 24/7.
Because the 4 levels are available to you and your household members at one time, each student can work at their own level at the same time using their individual login i.d.’s and passwords.
Core Piano is the place to start for anyone who doesn’t have any experience at the piano and needs to learn how to find notes on the keyboard, how to sit properly, how to strike the keys and use proper hand position, etc.
Book 1: Perfect for Beginners is for the beginner pianist and features 6 original pieces of music to practice. It teaches students how to read music, improvise, and create their own music. Each unit in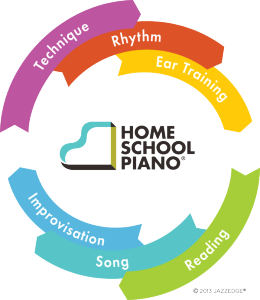 cludes graded quizzes.
Book 2: Building a Foundation is intended for someone with some piano experience to improve their skills. It continues with reading music, songs and improvisation, rhythm, and technique.
Book 3: Unlocking the Pianist Within is intended to hone your skills and provide you with more challenging work. It teaches you how to create rich piano arrangements and incorporates original pieces in a variety of musical styles.
Learn about the program’s 6-step learning cycle and sign up for a free lesson to see what it’s all about. Each book also includes a bonus section so students who are ready can learn more advanced techniques.
The Complete Beginner Piano Program includes:
- Unlimited lifetime access to HomeSchoolPiano.com
- Tracking and quizzes for up to 5 students
- Unlimited lesson streaming to any device
- Unlimited music downloads
- Unlimited video lesson downloads
- Downloadable Jam Track CD
You get all this for one payment of just $299, or three monthly payments of just $99.97. This program is designed for both children and adults of all ages.
OUR EXPERIENCE:
Haylee and I are absolute beginners. We’ve played around with other kinds of music programs before, but we’ve never really taken any formal piano lessons, so we knew we both needed t o start from the beginning. That meant we would only be working with the Core Piano book during the review period.
We made a plan to work on 3 lessons per week on Mondays, Wednesdays, and Fridays. Then we had the opportunity to practice in between and/or on the weekends when we had more time. Fortunately, each lesson focused on a specific skill, so it was super easy to integrate the lessons into our school routine.
As we viewed each video, we were able to see the instructor talking to us in the corner of the screen, a bird’s eye view of the instructor’s hands on the piano keys, as well as a view of a virtual keyboard above that where the keys lit up as the instructor played on the actual piano and indicated what note was being played.
Once I logged in, there was also a link for a downloadable music book to print to go along with the lessons in the Core Piano book, so I opted to print that in booklet style and made a laminated cover so I could bind it from the top and make a little flip book that would lay flat.
")
")
Haylee and I were able to complete 18 lessons during the review period, so I’d like to summarize for you what we learned in each lesson in order to give you a good feel for the pace and the kind of material that was covered in the Core Piano book.
Lesson 1: Introduction
- This was merely a 2-minute introduction that summarized the purpose of the Core Piano program.
Lesson 2: Notes of the Piano
- This lesson was about 5 minutes in length and mainly covered how to find the note C to the left of each grouping of 2 black keys. It also discussed how to find middle C on the keyboard.
Lesson 3: Low and High Notes
- This lesson was about 4 minutes long, and the instructor explained how to recognize low vs. high notes. He equated low notes to an elephant down on the ground and showed how those low notes sound like what would make you think of an elephant stomping around. Then he equated high notes to birds up high with a fluttery sort of high sound. He explained how notes up high on a staff are the high notes on the keyboard, and low notes on the staff are the low notes on the keyboard. He talked about how moving to the left on the keyboard takes you to the lower notes and moving to the right takes you to the higher notes. This was a cute, kid-friendly lesson that was easy for my daughter to understand.
Lesson 4: The Musical Alphabet
- This lesson was about 7 minutes long, and he explained how the notes in the musical alphabet are just like saying the alphabet, but only from A-G, and then it keeps repeating only those letters. He asked the student to practice the letters for the notes both forwards and backwards quickly so you can think through the notes quickly. He briefly mentioned how you can play steps and skips, and he recommended that for practice, you have someone randomly press a key and then you try to identify what the note is.
Lesson 5: Finger Numbers
- This less was about 3 minutes long, and it was all about learning which finger to use to play each note. We learned that the first finger is the thumb, the second finger is the index finger, the third finger is the middle finger, the fourth finger is the ring finger, and the fifth finger is the pinkie finger. This numbering system remains the same for both the left and right hands.
Lesson 6: How to Sit at the Piano
- This lesson is about 10 minutes long and explains the proper positioning for being seated at the piano. Basically, the shoulders should be relaxed, the elbows should be parallel to the keyboard, and sitting back at the distance from your fists against the keyboard to your el
 bows at your sides. The distance is necessary so you can pivot from your hips, sitting up tall, with room to move your hands up and down the keyboard. It’s also important not to tilt your head down, but to instead glance down with your eyes. He talks about how there are famous pianists who use poor posture and positioning, but he explains how they most likely deal with pain and discomfort from not sitting properly at the keyboard. He also explains how young children may need a small bench to plant their feet on so that their legs are at a 90-degree angle. He also mentions that nice, regular breathing is important so you don’t create tension in your body. He also talks about using common sense and altering the rules where it makes sense, like sliding down the bench if you’re playing on one end of the piano for a while.
Lesson 7: The Grab Technique
- This lesson is about 10 minutes long, and he talks about hand positioning. He explains how the natural position of your hand is rather curled, and you should try to maintain that shape when you’re playing whenever possible so your hands are relaxed in a natural position. He talks about how you don’t need to slam down your fingers on the keys in order to play the notes. Instead, you set your fingers on the keys and make a grabbing motion in order to play the keys. He suggests that you put a tissue on the keyboard and practice grabbing at the notes, pulling the tissue off as you do so. This helps reinforce the technique of grabbing at the keys with your fingers. He also talks about how there is a tendency to use the side of your pinky when you play finger 5. But he explains how you should only play with the pads of your fingers. When you get to the thumb, finger 1, you play the note by pulling in, the way your thumb is naturally designed to move. He suggests playing a rhythm on each note, practicing doing it with each finger so you can repetitively use the motion that each finger needs to use. He also suggests that you do this exercise slowly, perhaps even playing several notes at once like a chord, and do this exercise with both hands.
Lesson 8: Five Finger Scale
- This lesson is about 6-7 minutes long, and he talks about how the natural position of your hand when you lay it on the keyboard has your 5 fingers on five successive notes. So if you thumb is on the middle C, your other fingers are on D, E, F, and G. This is the five finger scale. He has us practice this scale by playing C, D, E, F, G, F, E, D, C, D, E, F, G, etc. up and down the scale like that. We repeated the exercise with the left hand starting with the pinky on F and the thumb on C. He reminded us to sit, grab, and breathe properly as we practiced this exercise. He said to be sure not to hold our breath as we were playing or else it would create a lot of tension, especially in the arms. He had us practice this repeatedly, playing both hands simultaneously, playing identical notes with each hand. He stressed the importance of practicing these little things, however unexciting they might be, so we would really master the technique for when we played more advanced pieces down the road.
Lesson 9: G Clef Guideposts
- This lesson was about 5-6 minutes. He talks about learning to read music and how it will take time to learn it. He shows us a treble clef and a couple of notes on the staff and explains how treble clef notes are usually (but not always) played with the right hand. He shows how notes can be on a line or in a space on the staff, and he explains that the treble clef G note is the G beside middle C on the keyboard. He also reminds us that as notes go up on the staff, they go to the right on the keyboard.
Lesson 10: Steps and Skips
- This lesson was about 8 minutes. He talks about the pattern of lines and spaces on the G clef. He explains how when you go from a line to the next
 space or vice versa, that is called a step. But if you go from a line to the next line or from a space to the next space, that is called a skip. When I was a kid in school, I remember learning to name the lines by saying “Every Good Boy Does Fine,” and the spaces by saying “FACE.” But the instructor says it’s not a good idea to learn it that way, because when you get to the F clef, it doesn’t follow the same pattern. He says it’s best to learn the notes based on their intervals (distance from each other). He also says you should be sure to memorize where the G note is on the G clef, and then you can start to see the relationship to the other notes from there.
Lesson 11: Half and Whole Steps
- This lesson was about 8 minutes. He talks about the chromatic scale and how that means playing all the keys from one note to the very next note on the keyboard, which includes the black keys in between the white ones. When you go from one key to the very next key, that’s called a half step. Then he plays some notes together and quizzes us on whether or not he’s playing a half step. A whole step is when you play 2 notes over from where you are (including the black keys). He asks us just to practice playing the half steps and whole steps to get familiar with them.
Lesson 12: Higher and Lower on Staff
- This lesson is about 6 minutes. He shows a G clef with 5 notes on it that ends with G. He directs us to name the musical alphabet backwards to determine what the previous notes are on the staff. The notes went from middle C to G, and the music showed numbers underneath the notes to tell us which finger to use to play each note. We start with the thumb and play the notes shown. Then he showed a G clef with the notes playing the other direction, going downward. Then he shows some notes where there are downward steps and then an upward skip. This was a neat opportunity to practice steps, skips, playing both upward and downward, using the musical alphabet, and using the finger numbers. I think this was the point where Haylee and I both started to see all those simpler little lessons coming together and showing us their purpose. I got kind of excited myself!
Lesson 13: The F Clef
- This lesson was about 2 and a half minutes. Here, he shows us the F clef, or bass clef as I learned to call it in school. He points out that the big dotted end of the F clef shows us where the F note is, which is played just below the middle C. He also shows that the highest C on the F clef is the same middle C note that is shown at the bottom of the G clef, which shows us that C is the one line that falls between the G and F clefs. These guidepost notes on the F and G clefs are shown in the printable booklet that goes with the Core Piano book I mentioned earlier in the review.
Lesson 14: The Grand Staff
- This lesson is about 6 minutes long. He talks about how when the G clef and F clef are joined together by a bracket on the left-hand side, it is called a grand staff. He shows how although the middle C note appears on both clefs, the grand staff shows a gap between the two clefs so that the notes don’t get all jammed together on the printed music. This makes it easier for us to read the notes. Then he shows us a grand clef with some notes on both staffs and shows us how to play those notes at the same time using both hands. That was neat! Haylee and I couldn’t wait to start playing some songs! We were starting to see that we were working our way in that direction slowly but surely.
Lesson 15: Barlines and Measures
- This lesson is about 2 and a half minutes. He shows us barlines and how those separate measures which show the beats indicated in the time signature. He explains that the barlines and measures are just a way of organizing the music for us.
Lesson 16: Time Signatures
- This lesson is 6 and a half minutes long. He talks about time signature and how it helps us play with a steady beat, much like a heartbeat. He explains how the top number in the time signature shows how many beats will be in each measure. The bottom number shows us what kind of note will get one beat. So in a 4/4 time signature, the top number shows us that there are 4 beats per measure, and the bottom number shows us that the quarter note will get one beat. He goes on to show us other examples like 3/4 time…meaning 3 beats per measure with the quarter note getting one beat. He also shows us different combinations of notes that can total the number of beats per measure. I already knew how many beats each note receives, but Haylee didn’t. He told us he’d be teaching us those values later in the rhythm section.
Lesson 17: Ties
- This lesson was about 3 minutes. He shows a series of half notes on a staff with a 4/4 time signature. But he shows a curved line between the last half note of the first measure and the first half note of the second measure, which is called a tie. It “ties” the notes together. So instead of playing two separate half notes, you’d play all 4 beats as one note, as if it were a whole note with 4 beats.
Lesson 18: Slurs
- This lesson was about 2 and a half minutes. He shows a staff with a tie as we learned in the last lesson, with the tie joining two of the same note. Then he shows another staff with the same curved line but which joined together different notes. This is called a slur. A slur joins different notes together and means that you should play the notes “legato” without lifting the hand. He says he’ll explain what legato is in a future lesson.
Haylee and I have both rea lly enjoyed the lessons. Haylee was a bit bored at first, but I reminded her of how you have to learn to walk before you learn to run. She started out learning the same kinds of technique-related lessons when she took guitar lessons last year. The difference was that we couldn’t afford to continue the lessons, so she never got to the fun of actually playing music. So what we really love about this program is that once you’ve purchased it, you can continue the lessons at your own pace, whenever it’s convenient for you, and you never have anything else to buy…it’s just a one-time expense! And what’s more, since up to 5 students can use it at the same time in your household, it really adds to the overall value in my book. Even my 6-year old son gave some of the lessons a try, and he had lots of fun, too! In the end, we found that whenever someone was working on a lesson, it was hard to resist having a turn, too!
Plus, I have the flexibility to adapt it in a way that fits each student. So if we get to a lesson we’ve covered before in a previous music program or experience, we have the ability to just move on to the next lesson, and each student can start in the book that suits their experience level best. And if I really want to, I can also jump to another book just to try out playing a song so I don’t get too bored while I’m covering the basics. Also, I like that the website remembers the last lesson each person worked on so you can log in and pick up right where you left off without having to personally note where you stopped the last time you practiced.
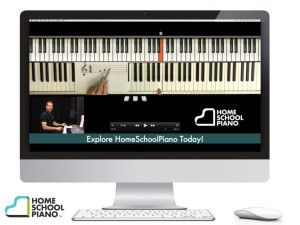
I also like that it’s so easy to pause or rewind a lesson if I need to hear part of it again or I want to stop and practice for a few minutes before moving on. It’s also great that you can use a stand-alone keyboard and aren’t forced to have one that connects to the computer, which makes it possible to use a tablet or other portable device to watch the lessons. I can even connect my laptop to the tv and watch the lessons on the big screen if we both want to practice and watch at the same time!
Overall, I’m very impressed with this program. It moves at a slow enough pace for even a child or true beginner to be able to follow easily, and every once in a while, the instructor will play something fancy to give you a taste of what’s to come. It’s kind of exciting to know that at some point, we’ll hopefully be able to play like that, as well!
I know from my research on this program that it puts a lot of emphasis on improvisation, which is something that sets it apart from other programs out there. Since we’re both such basic beginners, I can’t say much about that at this point…I’d just be happy to be able to play a piece of sheet music as is!  But I know that’s something that is important to a more advanced student.
My daughter really likes how easy it is to pull up the lessons and do them any time she’s in the mood without a lot of fuss or the need to ask for help from me. We’re both looking forward to continuing the lessons, and hopefully by this time next year, we’ll be playing away with actual sheet music!
Check out what other Crew members have to say about HomeSchoolPiano and its other levels by clicking the banner below.


 of 11 weeks if working 5 days per week. This level is considered the first step in the Analytical Grammar series and would be followed by Junior Analytical Grammar: Mechanics before moving on to the regular Analytical Grammar program.
minutes while following along in the student book. The speaker went over the first couple of practice sentences with her, pausing to give her a chance to work before explaining the answers. Then Haylee would complete the rest of the page on her own, asking me for help if she had any questions. Right off the bat, this helped build her confidence, and she surprisingly wanted to move on and work on the other worksheets, but I told her that spreading it out over a period of days was part of the process of making sure she remembered and had retained what she’d learned.


")
mpleting the assignment, Haylee had to turn over on the back and complete the “How Did I Do” self-evaluation. I found that if she was allowed to do this on her own as it was intended, she would over-credit herself for doing it really well, even when she hadn’t satisfied the criteria for such a grade. So then I’d have to go back and evaluate it myself. I think the solution for this is that we should look at it together and talk about it as she completes the evaluation so there’s a more accurate assessment of her work.
ual recommended that you only award points for each correctly identified word rather than deducting points for incorrect answers. I’d never taken that approach to grading before but found it rather refreshing and less stressful for me as the teacher, and it was certainly less stressful for Haylee as the recipient of the grade! A grading scale was also provided in the teacher’s manual that was broken down into either mastery, superiority, competency, probationary, or repeat. This, too, made it easy for me to truly evaluate just how I should view her performance.
")
")
")


")
")


