Sunday, July 28, 2013

Great SALE/FREEBIES @ CurrClick!!!

If you haven’t heard, it’s not too late to take advantage of this awesome sale at CurrClick!  It’s called the Pay What You Want Weekend, and it’s going on through Monday, July 29th.  Start at the link above and put as many items as you’d like in your cart.  For each item, you indicate the price YOU want to pay, and even if it’s $0.00, it’s yours for that price!  All items are instant downloads, so you get your purchases immediately. 

The site is very busy, but I found it to be functioning surprisingly well, given the amount of site traffic it’s receiving!  This is your chance to try out a number of publishers you’ve maybe looked at in the past but were afraid to try.  Personally, I highly recommend the Apologia lapbook projects by Knowledge Box Central.  They are awesome!  If you have any Apologia courses in your home, or you’re thinking about buying some this school year, grab these wonderful interactive lapbook journals while you can!  They will greatly enhance your student’s learning and help them keep their assignments organized.

Once you put items in your cart, double-check to make sure none of them have 3 red asterisks after the title.  If they do, you’ll have to remove those items before you can checkout (it means they are unavailable).  If you have any difficulties checking out, try breaking up your orders into groups of no more than 20 items.

Have fun finding some unique learning adventures for your children to enjoy and show support for these generous publishers in the process!

Happy shopping!

Friday, July 26, 2013

REVIEW: Global Art by Gryphon House

My daughter had the fun opportunity to use Global Art by Gryphon House.


WHAT IS IT?:

Global Art is essentially a craft idea book that promotes global understanding in elementary-aged children.  It introduces them to ways in which they can use various art mediums to express their creativity in the styles of countries and cultures from around the world.  It incorporates fun and engaging activities involving collage, painting, drawing, printing, construction, and sculpture. 

You can purchase this non-consumable 190-page book from Gryphon House for $16.95


OUR EXPERIENCE:

I should start by saying that my 8-year old daughter, Haylee, absolutely loves to do arts and crafts of any kind!  She was really excited when this book arrived in our mailbox.  She sat down with it right away and began perusing the pages so she could begin plotting which projects she wanted to tackle first!  I had her make a list of the ones she was most interested in so we could create a list of supplies to have on hand.  Surprisingly, we had most of the supplies already, as so many of them are basic, everyday craft supplies, so we were able to dig in get started the very first day!

We planned to use the book for after school enrichment so that we completed at least a couple of different projects each week.  It gave her something to look forward to once her assignments were done for the day!  Kathakali Face Painting 1 - India

I’d like to go through and just highlight a few of the projects she made.  First off, she was dying to try out face painting!  There were a couple of different projects face painting projects in the book, and we eventually tried them both! 

Our first project was Kathakali Face Painting, which represents the country of India.  We’ve never done face painting at home before, so I was skeptical of how well this would work.  The book told us to blend tempera paints with skin lotion so it would be easy to remove.  We made a palette of 6 colors to work with.  We applied it with Q-tips and a paint brush.Kathakali Face Painting 2 - India  Kathakali Face Painting is used by theater participants to transform them into their characters.  The book demonstrated a sort of clown type face, so we did that first.  She was so excited that she ran down to the neighbor’s house to show her girlfriends.

Haylee’s little 5-year old brother, Holden, decided that looked like fun.  He’d never gotten his face painted before.  He was wearing a lion shirt that day, so we decided to paint his face as a lion.  He loved it!  He even posed with a ROAR!  Smile  This projeFace Painting - Africact was a big hit with both kids.  I can definitely imagine us doing this one again and again.  Surprisingly, the paint really was easy to remove with just a wet paper towel!  Brilliant!

Haylee’s next project was simply Face Painting and represented the country of Africa.  This project was a traditional tribal face painting.  The book instructed us to make elongated triangles around the eyes with black and then fill it in with yellow/brown.  I have to admit that it looked pretty fierce, despite her smile!   She really enjoyed this one, too, and ran upstairs to dance around in a tribal manner and how her older brother how she looked.

Ancient Stenciling - ChinaAnother project Haylee was really excited about was called Ancient Stenciling, which represented the country of China.  The book instructed her to start off by drawing a design with a marker on a strip of acetate.  I just happened to have a box of overhead transparencies, so that was perfect for the job.  I cut off a long strip and let her draw some shapes.  Then I cut them out for her, and this made a stencil design.  Then she laid it on paper and filled it in with paints, creating designs in the shapes as she went.  She really loved this!  She wanted to keep her stencil strip so she could use it again another time and decorate it different ways.  We thought thisTangram Design Game - China project was a great idea with endless possibilities, and I’m sure we’ll be creating other designs in the future.

Then she did another project that represented China called Tangram Design Game.  The book explained how to draw and cut out tangram pieces from construction paper, but it just so happened that I had several sets of plastic tangram pieces on hand as a math manipulative (and what homeschooler doesn’t?), so we used those instead.  The primary example in the book showed a swan, so she used that as a starting point for creating pictures with the pieces.  Again, there are endless combinations here, and I loved that this proFiligree Jewelry - Egyptject was open-ended. 

Haylee is a big sucker for jewelry, so when she saw the Filigree Jewelry project that represented Egypt, she was ready to jump in.  In fact, she insisted on doing this project even though we did not have the wire listed in the required materials!  Being the creative type, she decided to improvise and use chenille stems instead.  Close enough, right?  They do have wire IN them!  Winking smile  This made for some very oversized earrings (and bracelets, too)Decorative Necklaces - Central Africa, but she had a lot of fun making them and hooking them over her ears.  I had a big laugh when she came in and showed me how she’d made it work.  I have to give her an A for the effort! 

Then she saw the Decorative Necklaces that represent Central Africa.  Appealing to her love of jewelry again, she grabbed some paper plates and got busy cutting out a necklace and decorating it with markers.  Now granted, this type of jewelry only looks good on an 8 year old, but she had a lot of fun making all of these projects! 

I’d have to say that this book was really a good choice for my daughter!  The projects were fun, the instructions were easy to follow, and the process was simple.  Nothing we made took a huge amount of time to make, which made them ideal for after-school activities.  Many of them, she was able to create on her own without any help for me, even gathering her own supplies from our craft supply drawers.  Others (like the face painting), required my assistance, but I have to admit it was fun, and I didn’t mind at all!  In fact, many of these projects were made more fun by working on them together.  We shared lots of smiles, and I envision us continuing to work on projects throughout our school year as the mood strikes us!  After all, she still has a list she made of her “must do” selections!  Smile

I would definitely recommend this book to anyone with elementary-aged kids who enjoy crafting.  It would make a fun supplement to any around-the-world studies you might be doing!  It was great that there were so MANY projects to choose from, so there was always something to suit Haylee’s mood.  And I have yet to have to purchase any special supplies…that’s the best kind of crafty fun…the kind you can do on the spur of the moment with materials you already have on hand.

See what other Crew members thought of this and other books from Gryphon House by clicking the banner below.

Photobucket

***

Thursday, July 25, 2013

REVIEW: TeenCoder: C# Series + Videos by Homeschool Programming

My teenage son recently got to try out the TeenCoder: C# Series + Videos by Homeschool Programming.


WHAT IS IT?:

The TeenCoder C# Series is a computer programming course designed for teens in grades 9-12 that teaches them the C# programming language.  C# (pronounced “C sharp”) is Microsoft’s newest computer programming language and is commonly used in business and academic settings.  Students use a free version of Microsoft Visual Studio called Visual C# 2010 Express.  This course is recommended for students who are interested in computer science as a career or hobby, or who need a computer science course for graduation.  There are 2 semesters of instruction in the Teen Coder C# Series, with the 1st semester covering Windows Programming and the 2nd semester covering Games Programming.

The Windows Programming course introduces students to the C# programming language.  Students will learn how to create various graphical Windows applications.  Take a look at this Demonstration Video to get a better idea of how this works.

The topics covered in this course include:

  • Introduction to the C# programming language
  • Creating graphical Windows screens
  • Using dialog controls
  • C# data types and variables
  • User input and flow control
  • Math functions and string operations
  • C# debugging and exception handling
  • Object-oriented programming concepts
  • Classes, inheritance, and polymorphism
  • Collections, sorting, and recursion
  • File Input/Output

The Games Programming course pairs the C# programming language with Microsoft’s XNA Games Studio to provide a simple game-creation framework.  What student wouldn’t love to create their own game programs from scratch?  Watch this Demonstration Video for a closer look at this course.

The topics covered in this course include:

  • Game design, game engines, and timer loops
  • Screen coordinates and color concepts
  • Drawing, scaling, and rotating images
  • Handling keyboard, mouse, and XBox 360 Gamepad controller inputs
  • Creating Sprite objects
  • Collision detection
  • 2D animation techniques
  • Playing music and sound effects
  • Game physics
  • Maze generation and solution algorithms
  • Menus, overlays, and deployment models
  • Multi-player scrolling games
  • Game artificial intelligence (AI)

These 1-semester courses can be purchased individually for $75.00, or you can purchase a single-semester course with optional videos included for $90.

If you’re interested in the complete 2-semester course, you can purchase them as a package deal for $130.00, or you can purchase both semester courses with optional videos included for $155.00.

If you happen to own the student books already but do not have the videos, you can purchase the videos for the complete TeenCoder Series by themselves for $30.00.  While the video instruction is not required to complete the course, it is recommended.

To find out more, use one of these resources:

Neither of these programs require any previous programming experience, and they are self-led, so no teaching is required on your part!


OUR EXPERIENCE:

For the review, we received the complete TeenCoder C# Year Pack with the optional videos.  I assigned my 13-year old son, Hayden, to work on a chapter per week.  The first semester course is Windows Programming so the student can learn the C# programming language, and the second semester course is Games Programming so the student can apply the C# to writing their own Windows games.  I’ll be mostly talking about the Windows Programming since we’ve not yet started on the Games Programming course, but I’ll summarize my thoughts on that, as well.

I should start by saying that Hayden was completely unfamiliar with the C# programming language.  Previously, he’d had an introduction to BASIC programming language only. 

In chapter 1, Hayden learned about the history of computers and the various editions of Windows that have been released over the years.  It gave him a good overview of how computers have operating systems have changed over time.  It also discussed the appearance of Windows programs and the consistency of function within them.  Then it described various programming languages and the improvements that have been made with each one.  It helped him understand how the C# language came to be.  Next came the accompanying activity.  Hayden had to install the free Visual C# 2010 Express software.  He said that took forever to install, so I know he was feeling a little frustrated, because he was anxious to get started on the programming lessons!  After installation, he downloaded the course files and got ready to go for the next Activity 2 - Enhance Hello Worldlesson.

In chapter 2, he learned more about the C# programming language and how to use source code to create an executable program.  In the activity, Hayden got to open an existing project he learned and make some changes by adding controls and changing the properties. He had to ensure his program met the requirements before moving on.  In a nutshell, he learned how to make a text box and make some design choices as to color, text, and a checkbox.  Piece of cake!

Activity 3 - A More Personal HelloIn chapter 3, Hayden learned about building a screen, # syntax, how to handle events, and how to use .NET Framework objects.  Basically, he understood that screens are referred to as forms in Windows programming, syntax means the rules of the programming language, and event-driven means how a program responds to actions of the user (controlled by elements in the code).  In the activity, he worked on how to make a new text box pop up when the user clicks on a certain thing in the program.

Activity 4 - Experiment with Data Types

In chapter 4, he learned how to name and use the data that programs need to complete their tasks.  He learned about numeric and binary data, and that every system object has special functions.  In the activity, he created a program with different variables and displays.  He designed his own form that worked as a calculator of sorts, but it just had a single function to double the number you input.  Hayden was pretty excited that he made something that actually worked!

In chapter 5, Hayden got to learn how to test data against certain conditions and have it react in the desired way based on the results.  This equates to the old “if/then” statements I remember learning as a child.  He was able to understand the manner in which the computer “thinks” when it makes comparisons.  He thought that was pretty cool.  He also learned about loops.  For the activity, he got to design a form with buttons and make an audio loop with beeping sounds.  He was able to choose the number of beeps and the timing of the intervals.

In chapter 6, he learned more about the various controls that are used to retrieve user input, as well as more about text boxes, list and combo boxes, radio buttons, and check boxes.  He understood that list boxes and combo boxes are both used for multiple choice responses.  However, list boxes show every response, but combo boxes require the user to click for a drop- down list of responses.  He also learned how the radio buttons work as a group.  He said although he has seen and used radio buttons and check boxes as a user, he never knew what they were actually called!  In the activity, he got to write a short story that included combo boxes for some of the details of the story, along with radio buttons and many of the other features.  This worked a lot like Mad Libs.  After the user makes selections, the program shows the completed story in a box at the bottom.  He really enjoyed this activity, because he could really customize the result!

In chapter 7, Hayden learned about performing basic mathematical operations with C#, as well as some advanced math functions.  In this section, he learned some of the shortcuts for mathematical functions, and he thought that was really helpful, because it shortened the length of the code necessary to achieve the same result.  He also got to make the graphics or “outer shell” of a calculator and create the buttons on it.  In the activity, he got to actually make the buttons on the calculator perform real mathematical functions.  He made a mistake the first time he tried this by programming the buttons backwards so they performed opposite functions!  He got a good laugh out of that but was able to fix it.

Now, I’d like to talk a little bit about the optional video instruction.  While 
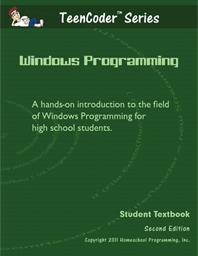
the student text is sufficient for learning and understanding the lessons, some students may find the lessons a little overwhelming at first, particularly if they have never programmed before.  Hayden had very little exposure to programming before this, and he initially did feel a bit intimidated.  I think the videos really helped with easing him into the lessons and helped him to feel more comfortable early on.

I’d also like to mention that although it’s too soon for Hayden to move on to the 2nd semester Games Programming course (he still has 9 more lessons in Windows Programming to go), we did take a look at the content.  I mentioned in the description at the top of this review what material and topics are covered in the second course in the series.  Learning the ins and outs of coding games is what Hayden looks forward to the most!  He’s quite anxious to finish up Windows Programming so he can move on to what he deems to be the best part!

Hayden really enjoyed the fact that all of his reading and studying in each chapter led him to an activity where he could practice and apply what he’d just learned.  He found it very rewarding to be able to see the computer respond to the code he’d written.  I think once he starts the Games Programming course, he will probably gain even more momentum and won’t want to limit himself to a chapter per week any more!

Overall, I think this course is laid out nicely.  It gives detailed explanations of new terms and includes lots of illustrations that help you to visualize the concepts.  The hands on activities really help to solidify the learning after every chapter.  I like that Hayden can sit down and complete a chapter without any assistance on my part, yet he’s excited enough about the results of his activities to come and get me so I can see what he can do.

Check out what other Crew members thought of this and other programming courses from Homeschool Programming by clicking the banner below.

Photobucket

***

Thursday, July 18, 2013

REVIEW: Couponing Made Simple by Christi the Coupon Coach

I got to read and review the wonderful book Couponing Made Simple by Christi the Coupon Coach.


WHAT IS IT?:

Couponing Made Simple is a no-nonsense book that not only describes the concept of couponing, but explains a great method for putting coupons to work for you and your grocery budget.

If you’ve ever seen people in line ahead of you at the grocery store and wondered what all the fuss with coupons was all about, you may want to give this book a try.

It’s available from Amazon for $18.00 for the physical book, or just $4.99 for the e-book in Kindle format (purchase link available on Christi’s website).  This book also has a “look inside” feature at Amazon so you can take a look at some of the contents before making your purchase.

I received the 132-page physical book for review purposes.  This is not a book about extreme couponing, but rather it’s a book about real couponing for real people with practical tips on how to make this practice work for you and your family.


OUR EXPERIENCE:

I must start by saying that in the past, I’ve been known as a serious couponer and rebater.  I subscribe to couponing and rebating websites, and I used to track my savings so I could show my husband how my “hobby” was saving us money.  But then, I didn’t have 3 kids, and the deals were more plentiful than they are today.  I got a lot of things for free years ago.  It seemed as the years went by, it became a lot of time-consuming work for very little savings, and I had mostly let it go by the wayside.  At that time, I used the “binder method” that is mentioned briefly in the book.  This is where you fill a zipper binder with trading card pages and file your clipped coupons into categories so the face shows inside each slot on the page.  When I dealt with a lot of coupons, this worked very well for me, but when my coupon usage waned, it became too much to keep up with for the return of savings.

Frankly, I wasn’t sure I was even interested in reviewing this book, because I couldn’t imagine there was anything new about couponing that I could learn.  And while I wasn’t exposed to any new concepts in the book, it did get me to try another method I hadn’t had confidence in trying before.

In Couponing Made Simple, Christi first gives you real life examples of the kind of savings you can expect when you get serious about couponing.  If you’ve never couponed before, this will certainly get your attention and make you continue reading the book.  Then she explains some of the basic rules for couponing.  Next, she decodes the language and jargon associated with coupons and sales and what it all really means to you.  Then she begins to explain her method for organizing her coupons.  Now this is largely a matter of preference, as there are many ways to file your coupons, whether it’s an expanding file, a card box, a binder, or a file box.  But pay attention here…this is where my personal journey with this book really began.  While I was fully aware of this method of organization, I had never bought into the idea that it would work for me and therefore had never actually tried it.

So my first step in implementing Christi’s methods was to set up my file box of hanging files and folders.  As a homeschooler, I had all the supplies I needed for this already on hand…file box with handled lid, Pendaflex files, manila folders, labels, and a pencil.  I immediately got to work by preparing the future home for my coupons.  Now although I hadn’t bothered removing the coupons from my Sunday paper for probably several months, I did have a stash of coupDSCF0715on inserts tucked away in envelopes that a friend at church had passed on to me every week after she’d clipped what she wanted from them.  So I set to work implementing this filing system right away using those inserts.  Then as my Sunday paper was delivered, I’d add the current Smart Source, and on Tuesdays when the Red Plum insert came in the mail, I’d add that one, too.  Then once a month, the Proctor & Gamble insert would be in the Sunday paper, as well.  And so my stockpile of coupons began.  I organized my box with right-tab folders for Red Plum, left-tab folders for Smart Source, and center-tab folders for Proctor & Gamble.  This makes it easier for me to spot the one I’m looking for.  I put them all in date order with the most recent in the front and working backwards.  I have a Pendaflex hanging file to house each month’s worth of coupons in manila folders.  This also makes it easy for me to go right where I need to in my file box.  I found that I had coupons dating from March to June available to me, so I was ready to get started.

Now in the next chapter of the book, she recommends purchasing extra Sunday papers so you can have multiple inserts, and she says you should have at least one set of inserts for each member in your household.  For me that would be 5.  Now I’m fortunate that my local Dollar Tree store sells my Sunday Paper for just $1 earl on Sunday mornings, so I could gain an extra Smart Source for just $1, but since Red Plum is not included here and only comes by mail, I’m not yet convinced that this is worth my while unless I know of a specific coupons in that specific insert that will make it worth my while.  Only time will tell if I take that advice or not.  But for now, I was thrilled to realize I had enough coupons on hand to get started with putting this method to the test right away. 

Other chapters take you through the step-by-step process of preparing for your shopping trips, matching coupons to sales, tips and tricks, and ethics.  The ethics chapter has very important for new couponers and veterans alike.  You want to make sure you start off doing things right. Bad couponers who don’t follow the rules because they either don’t know them or they simply ignore them eventually spoil it for the rest of us, so you want to learn to do it the right way.  Now I must point out here one flaw in the book.  Christi talks about how she files her matching coupon inserts with like pages together so she can stack them and cut multiples of the same coupons at one time.  I don’t know how many inserts she uses, but I do know that “batch cutting” is actually not allowed.  It’s one of those little known regulations of couponing that have been implemented by manufacturers in recent years due to the attention drawn by those “extreme” couponers.  Some coupon clearing houses actually have machines designed to detect batch cutting, and the manufacturer can refuse to redeem the coupons for the store who turned them in.  So in effect, by batch cutting, you can actually be robbing your favorite grocery store of the savings you received by making them pay for it themselves rather than being reimbursed by the manufacturer.  In turn, if accepting coupons is causing the grocery chains to lose money, they may implement tighter restrictions on coupon acceptance or eliminate accepting them at all. 

Although the book discusses networking and blogging and using those resources to help you with matching your coupons to sales for the best value, I was a bit disappointed that she didn’t actually name any of those great websites that she relies upon as resources.  It was actually one of the things I was looking forward to finding in the book, because I had seen Christi’s segment on the Today show on YouTube where she actually did mention a site she used to help her do her coupon matchups.  However, I did a quick internet search and easily came up with a number of great websites to help me plan the most effective shopping trips.  The most helpful one I used during the review period was www.survivingthestores.com.  I would definitely recommend checking it out.  You’ll see next how I used it to save LOTS of money while implementing Christi’s methods.

My first shopping trip with the new system was to Wal-mart.  I normally avoid Wal-mart like the plague because the checkout lines just take up too much of my time, but I’m fortunate that they recently opened up a brand new Wal-mart Neighborhood Market right around the corner from me, as in I can get home in 5 minutes or less.  Awesome!  It has mostly self-checkouts, and there are no long lines, so I chose to make this location my first coupon trip.  I sat down the night before as the kids were settling down for the night and utilized the Surviving the Stores website to help me make a shopping list and cut out or print any coupons I’d need for this trip.  I could sort the listings by final cost, so it was easy to begin with the items that would cost me the least ouWalmart Hault-of-pocket.  The site told me the item and size, the retail/sale price, less the amount of any applicable coupons along with where to find them (in which dated insert or at what link where I could print them out), and showed me the final price I’d pay after coupons.  If I had the indicated coupons and it was something I wanted to buy, I’d locate and/or print the coupons and then check the box next to that item on the list so it would automatically be added to my printable shopping list.  Once my list was ready and printed and I’d pulled all the necessary coupons, I was ready to go shop!  On this trip, I didn’t just buy items on sale or for which I had coupons, because I also had a regular shopping list of things I needed to buy.  So this reflects a real shopping trip, not just one to prove the value of coupons.  Here, I spent $89.58 before tax, and I saved $41.55 in coupons, reflecting a total savings of 32%!  Not bad at all!  I even bought a fair amount of fresh produce on this trip, so I was really pleased.  The cashier even remarked at how much money I’d saved as she watched my total go from over $130 down to under $90.  Impressive!

I was really pumped up after this trip, and my husband was pleased.  My next shopping trip was planned out the same way, but this time, I visited Target where I tend to shop most frequently for groceries.  I really wanted to see how much I could save there, because Target allows you to stack store coupons with manufacturer coupons for bigger savings.  In addition, they now have mobile coupons, which I’m just about to start using for the first time.  But on this trip, I spent $19 and saved $13 in coupons, plus an additional savings of 5% with my Target RedCard.  This was a savings of about 41%.  Awesome!  In this trip, I bought meat, cheese, produce, soup, and some frozen treats for the kids, so that was great!

Next up was a trip tHarris Teeter Haulo Harris Teeter to sum up the trio of stores I frequent the most.  Harris Teeter just happened to be doing Super Double Coupons that week, so it was a great time to maximize my savings potential.  Surviving the Stores does not list Harris Teeter coupon matchups, so I had to do a search for another site to plan my shopping trip this time.  For that reason, it was nice to have various internet resources available at my disposal.  On this trip, I spent just over $65 before taxes, and I saved $41.50 in coupons plus $56.40 in VIC store card savings, for a total savings of $97.90 on regular retail pricing.  But that $56.40 in straight coupons reflected a 39% savings.  I was very pleased, as I bought fresh meat, lots of cheese, and produce on this trip, as well.  I even got to stock up on my favorite natural soda, Zevia, which is normally quite expensive!

There’s a limit of 20 coupons per day at Harris Teeter during Super Doubles week, and they were out of a couple of items I wanted, as well.  So I went to another Harris Teeter location in the sameHarris Teeter Haul #2 week and rounded up a few more items with coupons.  I had been running errands all day, and it was past dinnertime already, so I also picked up a ready-to-eat meal while I was there, taking advantage of on-package coupons for items made earlier in the day on those ready-to-eat items.  Had I not been buying a meal for 5 people, my total reflected savings would have been much higher, as I spent about $8 on the meal alone.  But on this trip, I spent a total of $17.83 before taxes, and my coupon savings was $24.37!  Plus, I saved another $8.74 in VIC store card savings off retail prices.  But that straight coupon total of $24.37 reflected a 58% savings.  YES! 

So all told, I saved over $135 with coupons alone in just one week!  That’s pretty substantial!  And from the assortment of items I purchased, I can put together a variety of meals, as well as snacks and treats for my family.  Other than specific items I used up and needed to replace, I have not needed to make another big shopping trip since then.  My investment of time was minimal, and I executed it during our monthly break from school, so it didn’t affect our regular routine at all.  I am doing the happy dance!

After such successful shopping trips, I went ahead and went to www.coupons.com in early July to print off a new round of internet printable coupons for products I thought I might use.  You can print two of each coupon from each computer to which you have access.  Fortunately for me, each of the five members of my household has his or her own computer, so that works to my advantage DSCF0717when a great deal comes up using an internet coupon!  Smile  These coupons are cut out and then remain loose, though, so I had to organize these a little differently.  For one, I bought a bigger purse that is more tote-like but zips shut so I’d have plenty of room to carry my coupons with me at all times.  I went to Wal-mart and bought a small accordion-style coupon file with 13 tabbed sections in it for $2.50 so I could label the categories and keep my loose coupons filed here for easy access.  I also bought another one at Dollar Tree for $1 with 7 tabbed sections in it for filing those register coupons that spit out at the checkout stand, sorting them by store, since they’re only valid at that particular store chain.  Now there are no more loose coupons in my purse, and it’s easy to find and file new coupons when I need them.

With this system of organization in place, I am well prepared to continue growing my cache of coupons and have a means to utilize them effectively whenever I’m ready to shop.  I’m finding that even with those unplanned stops for this or that, I’m well prepared to save money now that I have my small coupon organizers always at the ready in my purse.  I’m regularly saving money at the register, and that’s what matters. 

Overall, I’d most definitely recommend this book for a new couponer, and it should be an automatic gift for any college student who is just starting to support themselves.  For the veteran couponer, much of the book will repeat what you already know, but this system of organization was one that I had not tried before, even though I knew all about it.  It has gotten back into couponing regularly again without eating too much into my time, and that’s a good thing.  I will definitely continue this process and track my savings as a way to remind myself that I’m doing this for a reason. 

One thing I should mention is that you will find a number of typos and grammatical errors in the book.  This did bug me a bit, because it’s one of my pet peeves.  For this reason and because once you’ve read the book (and you can read it in an afternoon), you don’t really need to reference it again later, I would probably recommend going with the e-book version  for only $4.99.  It’s substantially less expensive than the printed book, and it will get the job done just as well.  But definitely invest in the book in one format or another and give couponing a try for yourself!

Check out what other Crew members thought of this book by clicking the banner below.

Photobucket

***

Wednesday, July 17, 2013

REVIEW: 20-Page Softcover Yearbook by Picaboo Yearbooks

I had the awesome opportunity to create my own 20-Page Softcover Yearbook at Picaboo Yearbooks.


WHAT IS IT?:

Picaboo Yearbooks offers awesome flexibility and options for building your very own yearbook online.  There’s no minimum order required, no deadlines to meet, a 3-week turnaround time to receive your order, free shipping on orders of 50+ yearbooks, and $8.99 US shipping on 1-49 yearbooks. 

And the best part is that each softcover 20-page book costs ONLY $8.49!  You can pay $0.22/page for additional pages over 20, and you can opt for hardcover for $18.99.  And you can even order a digital version of your yearbook in .epub format FREE of charge!


OUR EXPERIENCE:

You can really think out-of-the-box with this project.  This product isn’t necessarily for schools or big organizations.  Think family yearbook, family reunion book, cub scout/girl scout pack memoir, homeschool co-op, homeschool yearbook, vacation scrapbook, etc.

Do you like to scrapbook?  I do.  Unfortunately, though, I rarely have time any more to work on DSCF0686scrapbooking.  I have a bazillion papers and embellishments from which to choose, and even more photographs, but there they sit.  Yet with this product, I was able to spend 1-2 hours/day over the course of about a week and summarize an entire year of our lives at once! 

When I began the project, I sat down and created just the cover (I made the entire front cover a photo with the title overlaid on it) and the first page.  For the first page, I used their plug-in portrait template so all I had to do was select my photos and drag them into position on the page with my student’s names on the side the way you’d traditionally show class pictures in a yearbook.  I selected a background, some text, and that was that.  That was easy enough!

The next time I sat down to work on it, I felt a bit frustrated, as I didn’t know where to go from there.  The rest of my pages were free-form style, and I didn’t really understand how the site and the tools were laid out and how everything worked.  It wasn’t that intuitive to me right off the bat.  Then I saw where someone had mentioned there were tutorial videos on the site, so I went to check those out.  After watching just a couple of the how-to’s, I suddenly had a sense for how it all worked and didn’t need to look up instructions for anything else.  From that point on, everything really was pretty intuitive after all.

I set myself a pace of completing about 3 pages a day, but by the end, I finished up a day early because it wDSCF0687as the weekend, so I had more time to spend on it.  Each night, I selected the theme for 3 pages and uploaded the corresponding choices of photos to that section.  Then all I had to do the next day was decide how many of the photos I wanted to use, select a plug-in template that accommodated that number of photos, plug them in, choose a background, and add my journaling text.  Voila!  Then I’d do the prep work to set up for the next day’s pages.

When I finished my 20 pages, I went back and tried to proofread my text and make sure the pages were in the right order.  I assembled the pages as I felt moved to do so, and I was able to easily rearrange them in date order at the end just by dragging and dropping each section.  I made each theme a section so I’d have the ability to entirely rearrange them at the end.  That worked well for me.  I also kept each section to a single page so I wouldn’t have to worry about splitting up a 2-page spread when I rearranged the order later. 

One other neat thing to note about the section feature is that if you were collaborating on the project with multiple people, you could assign a section to each person and have them separately working on it at the same time, and then edit and review for one book at the end.  That’s pretty cool!  I got to thinking how handy that would be after a family reunion, for instance, when each attendee has their own set of photos, but everyone wants to share what they have with everyone else.  This would make that process so easy!

I will say that while I was adding journaling to the pages, the tiny, tiny print was seriously straining my 41-year old eyes.  I did find a little magnifying glass that made what a typed a DSCF0688little bit larger while I was typing it, and that helped, but I didn’t discover that until I’d already done quite a few pages.  When I finished the book and went to order it, it notified me that I had to review and “lock” each section before I could check out.  In my review of the pages, I admit I got tired of enlarging each page to proofread the print and just locked the last few pages without looking more closely at them.  I later regretted this when I found two typos in my printed book!  Bummer!

After I locked the pages, I began the checkout process.  That was pretty simple.  I was surprised, though, that shipping cost more than the book itself!  As a customer, I find high shipping rates a big turnoff.  Personally, I’d rather see the cost reflected in the actual item price, but that’s a personal preference.  The final cost of a 20-page softcover book would actually be $8.49 + $8.99 shipping = $17.48.  That’s fairly comparable to other sites, and I found the site so fun and easy to use that I’d probably use this service again in the future.  Another thing that softens the blow of the cost is the fact that you get a FREE digital version of your yearbook as an e-book immediately after checkout if you choose to receive it.  How great is that?  You can easily share that with your friends and family.  And what’s more, you have the option to *just* receive the e-book without purchasing a printed book at all.  That’s pretty great!  So that makes this site a value for everyone, regardless of your budget.

I received my book about a week after I ordered it.  It was packed well inside a very sturdy cardboDSCF0689ard box so there was no chance of it being damaged in shipping.  I was impressed by that.  I had chosen a glossy cover, and that looked really nice.  I was somewhat disappointed that the pages themselves were not glossy…I had expected that they would be, just because my own public school yearbooks were glossy, and I think it gives your photos a more professional look than matte.  But when I showed it to my husband, he was very impressed.  He said he thought it was well worth the cost and was a good value.  I have to admit that it was the fastest I’ve ever completed a total chronicle of a year’s worth of family events.  It would take a lot of time to complete a manual scrapbook of that many photos.  It was very nice.  The photos were all taken with a 16 MP digital camera, but I was surprised that some of the photos looked a bit grainy.  I did not do any editing of the photos before I uploaded them in terms of adjusting lighting or removing red-eye and that sort of thing, so I’d definitely recommend that you make your photos as optimum as possible before adding them to your book. 

I think I probably would use this service in the future, and it would certainly make a nice holiday gift for the grandmas.  I can certainly see how much easier it would be to keep up with an annual album by creating a page or section as the events happened and editing and finalizing them as you went along.  That would break up the work throughout the year so that when the school year came to an end, you’d be able to just go online and order your book and be done with it right away!  That would be wonderful!  And what’s more, you never have to bother with ordering prints!  Everything is digital.  Love it!DSCF0690

There are so many themes for the backgrounds to choose from, and you can also upload your own as photos.  On one of my pages, I wanted a zoo themed background, and there wasn’t one in the choices.  So I uploaded a digital scrapbook paper I had saved on my computer and adjusted the saturation so it wouldn’t be too strong underneath my text.  Perfect!

I would definitely recommend that you give this site a try.  The service was easy to use, very fast, convenient, and reasonably affordable.

Take a look at what other Crew members thought of this creative experience with Picaboo Yearbooks by clicking the banner below.

Photobucket

***

FREE Resources for Homeschoolers!!! Get them now!!!

Check out these freebies, some good today only, just for homeschoolers!

1.  FREE Summer Reading Practice Printables from All About Reading

2.  FREE Lapbook Kits at Curriculum Share

3.  FREE King Philip’s War Adventure novel (today only) by Susan Kilbride

4.  FREE Become a Fugalista in 30 Days:  Money-Saving Secrets for the Frugal Family Manager

5.  FREE Printables to accompany Draw, Write, Now books 1-4 from 1+1+1=1

6.  FREE A Simple Plan Online homeschool planner from Mardel

7.  FREE Old Testament Notebooking Pages from CurrClick

8.  FREE First Lessons in Nature Study from CurrClick

9.  FREE School and Chore Charts from CurrClick

Enjoy!

Tuesday, July 9, 2013

Two FUN and FREE Events This Week

Be sure to mark your calendars for these two exceptionally fun and FREE events coming up this week.  My kids wholeheartedly look forward to both of these outings every year.

1.  FREE SLURPEE DAY – Every year on July 11th, 7-11 stores offer free 7.11-oz. cups of any Slurpee flavor, 1 per guest, until the supply of little cups runs out at each store.  If there’s one thing my kids love, it’s Slurpees.  I hardly ever buy them, because it’s just too costly for 5 people.  But Free Slurpee Day means piling into the van and driving from one 7-11 store to the next, downing the free Slurpee en route to the next store.  Every year, we try to hit as many nearby stores as we can, collecting and saving the cups.  At the end of the adventure (when we either have a sugar rush or brain freeze), we come home and stack the cups we’ve collected into a pyramid, snap a photo, and put it in our scrapbook.  We love to try to break our previous record each year!

2.  COW APPRECIATION DAY – Every year in July, Chick-Fil-A sponsors a Cow Appreciation Day in their restaurants.  Every person who comes in wearing any cow-print item gets a FREE sandwich of their choice.  Every person who comes in dressed as a cow from head-to-toe gets a FREE combo meal of their choice!  Now, CFA is very lenient on what constitutes a head-to-toe costume.  You merely need to have something cow-related on your head, torso, down to a tail to get the free meal.  They even offer a free printable costume right on their website.  It includes cow spots and the “Eat Mor Chikin” sign that you can tape onto your t-shirt, a nose to tape on, 2 cow ears you can tape to a baseball cap, and a tail to tape to your behind.  Easy peasy!  They always have the mascot in-store to pose with you for pictures, and they often offer in-store drawings for prizes, as well.  You can even enter your photo into a national contest for a grand prize.  Sometimes, an employee goes around snapping photos of your family to post on their bulletin board, or to print in-store and present to you in a little paper photo frame to take home.  Sometimes they even offer free samples of new products or things they’d like you to try…a popular offering is samples of their hand-spun milkshakes.  Without a doubt, the atmosphere is fun and contagious.  We always have a great time seeing all of the costumes people have come up with!  If you’re really thrifty, you can visit one location for breakfast, one for lunch, and one for dinner! 

So be sure to remind yourself of these two great family events this week…Thursday and Friday!

Monday, July 8, 2013

REVIEW: Mayan Mysteries Online Game by Dig-It Games

We recently got to try out a really cool educational game called Mayan Mysteries Online Game by Dig-It Games.


WHAT IS IT?:

Mayan Mysteries is an educational history-oriented mystery game that can either be played via online subscription on PC or MAC for $21.99/year for a single user or via an app for the iPad for $9.99. 

Through interactive gameplay, students can visit Maya sites, uncover and analyze artifacts, decode glyphs, explore the mysterious Maya calendar, learn the intriguing Maya math system, solve puzzles, and gather clues to track the character Ladrone.

You can explore the FREE demo here.  You can also watch a video about this game here.

This mystery game is specifically designed for students in grades 5-9 or ages 11+.  Students will combine in-depth study of Maya civilization and culture with activities that test reading comprehension, geographical knowledge, spatial reasoning, and science and math skills.  It includes an in-game encyclopedia, which allows students to explore information on such topics as the Maya governmental system, farming practices, and their beliefs about time.


OUR EXPERIENCE:

My 13-year old son, Hayden, was the primary candidate to try out this game.  He was in the target age range, so he got to try it first.  The game is designed to provide about 12 hours of gameplay.  He played a little each day over the course of about 3-4 days, and he completed the game in what he estimated to be about 6 hours in total.  He likes mysteries, though, and is really adept at computer and online gameplay, so that may or may not be typical of most players his age.

He said he learned quite a few facts about the Mayan culture and history that were new to him.  We’ve previously studied this topic pretty extensively, so I was impressed that he still learned something new. 

To play, you log in with your username and password, and then gameplay is launched.  As you progress through the three levels of play, you have opportunities to earn a number of achievement badges along the way.  These include the Golden Trowel, Eagle Eye, Genius Decoder, Math Maniac, Time Traveler, Ichaak Idol, Colossal Collector, various Site Superstars, and various Puzzle Perfectionists. 

The game has a number of settings you can adjust, which include volume levels for the music, sound effects, and voice, as well as whether or not you want to turn on audio for the scripted portions tDSCF0660o be automatically read aloud to you.  This game does involve a lot of reading, so kids might enjoy turning on that feature so they don’t get tired of reading the scripts to themselves.  Personally, I thought the music and sound effects were pretty cool, and my son did, too.

Hayden managed to collect 6 of the 15 achievement badges, 15 of 47 artifacts, and did 16 puzzles with a score of 91,015.  So despite having completed the mystery up to this point, he also has the option to reset the game and start over, attempting to collect more badges and artifacts the next time around. 

Once he reached the end of the game, he was congratulated and then taken to this screen:

DSCF0658

Surprise!  From that, it seems the chase continues in an upcoming sequel adventure called Mayan Mysteries 2.  Sounds like fun!

Overall, Hayden thought the game was fun and educational, but he did say he wished it had been a bit more challenging.  To him, the game seemed rather easy, but he is almost 14 and just started 9th grade, so he’s definitely at the higher end of the recommended age.  In contrast with my daughter, who is almost 9, the level of gameplay seemed more challenging for her and perhaps more age-appropriate because of that.  She played the free demo before we got access to the full version game, and she was totally hooked!  She couldn’t wait for her brother to finish the adventure so she could have a turn to play the whole game, which she just started working on by clicking on “start new” after he finished the game.

I think if your students were studying this topic in history, this game would make a fun and engaging way to supplement their studies and explore the topic further.  The game is fun and something that kids can look forward to doing while still learning some history.

Check out what other Crew members thought of this online game as well as the iPad app by clicking the banner below.

Photobucket

***